Saturday 22 April 2017

Release 0.4 - Finishing Up the Semester!

I've been working all day today on some of these issues for Adobe Brackets. This is my final release, and although I want to push a little further and make this a double-issue release, we'll see...

For my last release, I chose to help Brackets with one of their translations for the Portuguese Menu Commands:
European Portuguese Menu

The task looked simple enough, but I found it to be a little more involved than surface level appearances. The person filing the issue commented that the Portuguese Menu Commands were mostly all in English and was suggesting that translations be made. The administrators recommended that he make a pull request, but he never got around to actually doing it. Here is what I had to work with:


Here, I'm just showing half of the menu command options. One of the advantages I had is a background foundation of French, Spanish and some Italian. Knowing the basics of all three languages gave me a pretty good idea of Romantic language grammar, so even though I'm certain my translations aren't perfect, they convey the right meaning, and the administrators can clean up later with colloquial speech.

The first part was realizing where the Menu Command wording was coming from, which was /src/nls/pt-pt/strings.js

When I tried looking for most of the CMD_CUT, CMD_COPY, etc... I realized that they were missing from that source code (which is why they rendered into default English). So I hopped over to reading the Spanish and French versions of the Menu Commands, which had completed lists. I read the CMD names, and paid attention to mentally translating the phrases used in French/Spanish to make sure that it was related to the Menu Commands I needed. Then I copied over the CMD names and used my Portuguese translations with them. It was sort of a tedious task ( 62 Phrases ).

I tried to make sure that the translations were as concise as possible, without the most accurate meaning that Google Translate was giving me, and that all the Commands had a similar format to them. I tested out the Menu Command bar, and it looks very good!

If I can find another bug to solve in the next few hours I will attempt to add it to this release, but if not, this makes number 4! Here's a link to the pull request and some pictures.


PR for the Portuguese Menu Commands

                            BEFORE


                                       AFTER


                       BEFORE


                                                                                                                     AFTER


--------------------------

Like I mentioned in my previous release, I'm beginning to see how all the parts interconnect. I was always confused earlier about how some lines of code created visual displays of editor boxes and buttons and selectable items and such. Going through all the source code and skimming over the information gave me clues as to how the whole thing pieced itself into a cohesive whole. The whole concept of creating a project that connects to other people's ideas and finding ways to implement that actually intrigues me, because I don't know how to do it yet, but it seems to hold so much power for creating great things. In my previous and current release, I wanted to solve issues that were not incredibly complicated (like taking outside code and just making it fit with this project - because I was still getting my head around this one first!).
That's how I think: I need to understand the perspective, I need the world-view of what I'm doing. Getting a grip on what Brackets IS became the most important task for me this week. I can't say I'm even moderately comfortable yet, but I'm beginning to see the whole. My focus was to learn about the project, and in the meantime, take up issues that people had forgotten, dismissed, or didn't care about. Even though they were not high priority, somebody noticed them and made a complaint. People thought about fixing them, but nobody did. I chose issues that had been on the board for almost 2-3 years, and had still not even been looked at. In my opinion, those who are not fighting on the front lines of the battle should clean up in the background. It just makes sense to clean up the clutter and make the issue board more concise and relevant to the issues that will move the project forward, and not be bogged down with details that are solvable but nobody wants to put the time in. Even though my issues were not very complicated, they are useful to the people who read in those languages and they do matter in their own right.
My hope is to continue working in Thimble and Brackets, picking up more of the complicated machinery and making more significant contributions in the near future.

Friday 21 April 2017

Release 0.3 - Two For One!

I accomplished two issues today, both relating to localization issues for Adobe/Brackets.

Here are the 2 issues I fixed:

Link Doesn't Redirect to Japanese Page
Index Page Without Japanese Comments

Both of these issues related to Japanese viewing of Brackets. Accomplishing these was also the most fun so far.

For the 2nd issue, the index.html page had their comments written in English, while other language index.html pages had the comments already translated into their respective dialect. I made use of Google Translate, and tried different variations of simple 'single word' or 'simple phrase' combinations in order to make sure that the translations were as accurate and colloquial as possible. Furthermore, I also enlisted the help of Facebook friends and broader community for a native Japanese speaker to confirm my translations were correct. One woman, corrected 2/6 phrases and said that her translations sounded 'a bit nicer'. So I wasn't too far off! So I was able to successfully update the index.html page for the Japanese and its now currently being analyzed by the Adobe ALF team members.

The first issue was even simpler. Its in fact quite astonishing that if you change the language option for Brackets, a lot of the menu items and links still have not been converted into that language! I could possibly spend time fixing a bunch of menu items for the Portuguese right now, but we'll see. Anyway, one of the Help -> About Brackets on the Japanese setting redirected to the default English page. I quickly searched for the Japanese page, and changed the URL string setting for it. As I mentioned in my Release 0.2, I spent a good amount of time reading through the entire /src code, so I had a pretty good idea where to look right away for these changes to be made! Time well spent!
Already the PR has been approved and the change has been made to the Adobe:master branch. So that is my second PR that has been successfully merged into the official repository of a project that I do not own. Not very impressive in the grand scheme of things, but impressive enough for me, who is just starting to get into the Open Source world!!

Anyway, I'm off to finish my 4th release. Hoping to report back shortly.

Here are my PR's:

Url Change for Japanese Page
Japanese Comment Translations

------------------

While doing these two issues, I thought about a couple of things...
Often times, people will find issues in the code, but either time constraints prevent them from pursuing it, or they get side-tracked and forget. Or perhaps they noticed the issue, but it wasn't important to them to fix. I think that having a background and interest in other languages was a good push for me to look into the issue and not be afraid of it. Also, even though both issues were not significant in the overall functionality of the project, every little bit of detail counts toward the total project. Having a Japanese person decide to use the program and realize that nobody cared enough if they understood how to use the program could really shut doors and opportunities in the long run... I also think part of my ability to solve these issues faster was getting comfortable knowing what sections of the project code serviced what needs, and focusing my attention in the right area. The more I look at the code, the more I see how they all interconnect with each other. My goals after finishing these releases is to go beyond, and start learning how to add extensions and other outside sources into this project. I think that is a more important and challenging goal.

Release 0.2 - Long Overdue

Sorry I took a long time to actually submit an actual Release 0.2!

If you would indulge a short rant of excuses:

I spent about about two weeks trying to figure out how to set up Thimble without virtualization. I discovered that nobody bothered to attempt it because it's a total nightmare. Apparently nobody was doing that anyways.
Manual Setup Instructions

I then moved on to try adding some extensions for ESLINT. I kept running into issues where the build was diving deep into /node_modules, and was really messing up everything. I couldn't figure out if the problem was globbing syntax, and I put that issue on the back burner. I actually may try to solve that today as my 4th release if there is time left over.
Eslint Doesn't Check Extensions

Much later on, I went into Adobe/Brackets and looked at their issues. One sparked my interest, concerning antialiasing issues. I had never heard of it before so I took a look.

Basically, the rendering of fonts on different platforms and different screens gives viewers a certain look depending on how they are viewing the text. Antialiasing has been used of late in order to make the text look a little softer and hide the jagged edges that you will see if the screen display the pixels very accurately and crisply. The problem with using it in overkill is that other text begins to look washed out when you don't want it to. It's a balance that really depends on each individual selection of text, taking into account its font size and the view of other web elements around it.

The issue I worked on was:
Quick Edit Rendered with Grayscale Antialiasing

The problem was that it wasn't the regular text (like paragraphs or html source code) that was being blurred. The problem was actually inside the Quick Edit panel and the Right-Click pop up box. These fundamental Brackets components were being affected by Grayscale.

I spent a good deal of time (probably 5 hours) reading through the entire /src code. Not in depth of course, but I kept an eye out for certain key words relating to my issue while at the same time, just allowing myself to get a feel of what every folder accomplished in simple terms for the Brackets application.

I also used my cloned repository to do a massive search of the entire project for anything related to the -webkit-font-smoothing: antialiasing key words.

grep -r --color 'webkit-font-smoothing'

At the end of my search, I basically concluded that all the code that would affect the Brackets editor itself and contained the antialiasing references were found in just 3 files:

/src/view/ViewCommandHandlers.js
/src/styles/brackets.less
/src/styles/brackets_patterns_override.less

The last link was important, because it was the only source code that explicitly called for antialiasing when representing:
.uneditable-input
&::-webkit-input-placeholder

.btn

So I made the changes and switched them with subpixel-antialiasing which is the crisper way of rendering fonts.

Also I mentioned in my PR that Adobe's Brackets 1.10 had come out recently, so I was testing the Default settings without any code changes. I realized that the issue was not visible in 1.10.
However, a week earlier I had been playing around with their Brackets 1.9, and the antialiasing problem WAS there. 


So my conclusion is that the issue was somehow resolved 'accidently' because the administrators were not able to tell us that the problem was fixed already. They were unaware that it was fine in 1.10. One of the administrators spent time trying to point me in the right direction. At the same time, I still stand by my changes, because they are explicit patterns overriding the default Bootstrap implementations. I believe that I made a thorough search through the /src files relating to the functionality of Brackets editor, and found the only relevant references to antialiasing for the issue.
If the issue becomes a problem in later versions of Brackets, I'm sure I will be available to step in again. Here is my PR :)

PR for Issue #13189


Tuesday 28 March 2017

Progress on Release 0.2

My fellow classmates and I have been working away at our 2nd and (some are on their 3rd releases) for some weeks now. After having chosen a bug that was very complicated and would take more time than I had to spare for this semester, I moved on to a new topic.

My new issue to solve was: https://github.com/mozilla/brackets/pull/658

So far, I have run into issues that don't directly involve the code that I wrote, but somewhere in the npm building and testing with Travis Cl, it is trying to access directories that I don't have in my current cloned version. I haven't been able to figure out what part of the Gruntfile.js is calling deep into 3rd-party extension codes, nor have I figured out what exactly is happening during these 'builds'.

I'm going to keep working away at it, but I realize that the end of the semester is approaching in a few weeks. It's time to take on the 3rd and 4th releases now I believe. Somehow I'll have to juggle 3 releases at the same time in order to fulfill the course requirements.

The other issue I had in mind right now is for Adobe's Brackets as a 3rd release:
https://github.com/adobe/brackets/issues/13189

The 4th release might be: TBD

Friday 24 February 2017

Lab 6: Picking and Learning a Good Editor

For this lab, we are looking at several modern text editors that programmers use often for their work. This lab will require me to use 2 editors I have never used before and to experiment with them while logging my experience.

I think I'll try Nuclide (because I like the color purple).. and Atom because it looks cool.

One of the first instructions confused me:

"From the list of editors above, pick at least 2 that you've never used before and install them. Use the Mozilla Brackets repo to test the editor (i.e., try opening the entire project) in the chosen editors to see how they perform" 

 I thought it meant I had to run the Brackets software inside of my new editors, but the professor said that I had to play around with the file system using the editor instead. That makes much more sense now. Funny how I always interpret stuff in a strange way!!

To be honest, I can't tell yet the difference between Atom and Nuclide, because Nuclide seems to be a bonus part of Atom... so I'll talk about them like they are the same for now.

ATOM / NUCLIDE


1. Opening Projects / Files:
On the Welcome Guide page, you can open a project by clicking the 'Open Project' button and viewing folders on your computer. By clicking the folder, 'Brackets', it pulled in the entire project for me right away. I also have the option in the menu list to click File > Add File / Add Folder. Either method will get me the project I'm working on.

2. Changing Tab Options:
The default tab spacing appears to be 2 spaces. In order to change that, I need to go to:
File > Settings... then one the left menu of options choose 'Editor'. Going down editor's list of options you will find 'Tab Length' and change 'Default: 2'.

3. Opening the Editor from Command Line:
In order to open from command line, first open up the command line (Git Bash).
I searched for the file inside my directories and it was in /Desktop.
However, the file looked like: Atom.lnk
I googled about opening a .lnk file and the command is: "START Atom.lnk" [ The guide also said that if there was nothing other executable file with the name 'Atom', I could have just typed START Atom. ]

4. Searching For Strings/Files in Project:
I assume means like a 'Find' function or some version of grep. 
Luckily in the top menu, there is a 'Find' option. Choose option 'Find in Project' Ctrl+Shift+F. Type in any word(s) and the bar will pull up Project Find Results with all instances of those words. To find words inside the file in view in the editor, use the Find in Buffer option. If the words do not appear in the file you are viewing, ti shows no results. If it is in the file you are viewing, it will tell you how many instances are found in the file. By clicking find, it jumps to the first instance.

5. Split Screen Into Multiple Panes/Editors/Views:
For Panes - Go to the top menu under 'View' and choose 'Panes'. Here you can split up, down, left, right or focus on another pane beside the current pane. Splitting panes will make a replica of the current pane in focus and place it in the area you specified as a separate frame.

Original:


Pane Split:


It appears that editors and views are viewed inside the panes.. so creating more panes indirectly creates more editor windows and views. However, if you want a separate window for the project, click File > New Window. However, when I tried this, the program froze, so I don't recommend it...

6. Install Editor Extensions:
In case you have closed the welcome pages when the editor opens up, you can click File > Reload Window, and the Home, Welcome, and Welcome Guide tabs will reappear. From there go to Welcome Guide and select Install a Package. Or go to Settings and choose the option of Install.
From there you can input your package name into the textbox and search for it.

7. Using Multiple Cursors:
I searched online for the answers and the best sites were: 
https://atom.io/packages/multi-cursor
http://superuser.com/questions/957128/how-do-i-do-multi-line-editing-in-atom-editor
In windows, the keybindings for the OS are already mapped, so it interferes with the Atom program using multi-cursors. I think I have to go into the Settings and create my own set of keybindings for multiple cursors.


8. Some Common Key Bindings:
Some common key bindings readily available are:
a) alt+[#] -> press alt and a number and it will jump between the panes currently open by their number.
b) 


c)


9. Changing Key Bindings:
I had a hard time figuring out how to change key bindings. You can go into settings and view the key bindings that exist, but changing them wasn't easy to figure out intuitively. I googled the question one stack overflow question lead me in the right direction:
http://stackoverflow.com/questions/33023349/atom-disable-single-key-binding

I must:
a) Open settings with File > Settings
b) Click Keybindings
c) Filter the list by typing (for example ctrl[whatever-your-command-is] ) in the search box.
d) Click the clipboard icon next to the shortcut. This will copy the shortcut definition to your clipboard.
e) Click the hyperlinked text your keymap file.
f) Once inside the keymap.cson file, copy the clipboard to the file and make the changes to the keybindings functionality.


10. Enabling The Use of AutoComplete For HTML, JS, CSS,etc...:
There is a package (https://atom.io/packages/autoclose-html) which will complete the closing tag once an opening tag is created. Another package, https://atom.io/packages/autocomplete-plus, will offer a display of possible selections to choose from. There are other packages online that will most likely solve any other autocomplete needs by the editor if you search hard enough.


11. Changing Editor and Personal Preferences:
In order to change editor and personal preferences, you can always go into the Settings bar and mess around with the following features:


You can probably get by with almost any changes to match your preferences by browsing and playing around with these headers.

========================================================================

The second editor that I will be experimenting with will be the Visual Studio Code.
Right away when I downloaded the program, a web tab opened up with a 'Documentation for Visual Studio Code: Getting Started' page opened up. Nice nice!

VISUAL STUDIO CODE

1. Opening Projects / Files:
Like almost any program out there, to open files and projects you go to the menu bar which will have an 'Open File...' or 'Open Folder...' command near at hand.


2. Changing Tab Options:
The default tab spacing appears to be four spaces. In order to change the tab spacing, I clicked File > Preferences > Settings. A settings.json file popped up and in the Commonly Used (10) list I saw "editor.tabSize": 4. I had to click the edit icon next to the code when I hovered the cursor over it. It copied that code over to the USER SETTINGS which opened up in a new tab and said to write my new code there to overwrite the default settings. I changed the number in the code listed on the USER SETTINGS tab, saved the changes to the settings.json file and that changed the tab spacing.

3. Opening the Editor from Command Line:
In order to open Visual Studio Code from the command line, simply open up the command line and type "Code". That will be enough to open up the editor program. Very easy!

4. Searching For Strings/Files in Project:
In order to find strings or files in the project, go to Edit > Find or > Find in Files. A list of all matching strings will show up that you can search through and click, giving that entry its own editor tab for you to work on.


5. Split Screen Into Multiple Panes/Editors/Views:
In order to split the screen into multiple editors, click View > Split Editor. Or you can type Ctrl+\ .

6. Install Editor Extensions:
In order to find extensions, click View > Extensions. A tab will open with a search bar and a list of extensions that are available. Each extension on the list has an Install button attached.

7. Using Multiple Cursors:
In the Selection menu, you can find a few commands like 'Add Cursor Above', 'Add Cursor Below', 'Add Cursor to Line Ends'. The keybindings say Alt+Ctrl+UpArrow/DownArrow, but that will be overridden by the OS keybindings which rotate the screen directions. You can simply click the commands in the menu and they will appear on the code you are working on. I was able to click three times on the 'Add Cursor Above' and created a 3-line cursor which all typed the exact keys I typed at the same time on every line.

8. Some Common Key Bindings:
One amazing thing right on the start up screen after you load a project is a few key commands to do some important stuff.


Right away you can click Ctrl-Shift-P and a drop down window of commands with their keybindings will appear. You can debug, access Git, work with Extensions, change Views, work with Files, etc. It appears almost anything related to working with the program is a command in itself that can be found in this drop down. If you are working on a project and this Start Up screen goes away, click View > Command Palette and the drop down will reappear.

9. Changing Key Bindings:
In order to change key bindings, I read:
https://code.visualstudio.com/docs/customization/keybindings

I went to File > Preferences > Keyboard Shortcuts. It brought up two editor panes, one with the list of current default keybindings. The other pane had keybindings.json, which was a special page where I could make my own changes to overwrite the default settings.


10. Enabling The Use of AutoComplete For HTML, JS, CSS,etc...:
The editor on its own doesn't have an autocomplete feature. Its basic version allows you to start typing a word and hover the mouse cursor over it (or type Ctrl+Space), and it will give a drop down of possible keywords you might possibly mean to say. You can also download extensions that will help with autocomplete, likes IntelliSense or other offered programs.


11. Changing Editor and Personal Preferences:
For changing editor and personal preferences, simply go to File > Preferences > Settings or > Color Theme to make changes. In settings, all the possible variations of features are listed inside the settings list and all you need to do is change the User Settings file to overwrite the defaults.

-------------------------------------------

Overall, I found that I enjoyed the intuitive ease of figuring my way through Visual Studio Code more than I did with the Atom/Nuclide editors. I found that I had to mostly go through Google searching how to do things, while on Visual Studio Code editor, it placed everything I needed on the same page and made it clear what needed to be done. I did not make use of the extensions, because I find that my way of using editors is very basic and I am happy as long as the tab spacing looks nice and I can color-code the variables differently from the function names and generally block code. I think that Visual Studio Code would work better for me in the long run because it is efficient, makes intuitive sense to me, and I can accomplish a whole bunch of cool tasks without having to really know the keybindings, and I can change them as I see fit very easily if I wanted to.

Release 0.2 - Failed Release Topic

For my next contribution to Thimble I will be working on the issue:

https://github.com/mozilla/thimble.mozilla.org/issues/1700

In this issue, I will have to go through the processes of installing their software again, and document my journeys while doing so and giving recommendations + making the instruction set more read-able and accurate. I will be working on this during my study break week, so future results will be coming in shortly.

- February 24, 2017
-----------------------------------------------------------

The actual webpage we are editing is: Setting Up Thimble Without Virtualization

Some prerequisites for using Thimble without virtualization (Vagrant + Virtual Box) is:

Node.js 4.0 or greater. [ I have 6.9.5.0 ]
The website is missing a link to download it by the way: https://nodejs.org/en/

PostgreSQL 9.4 or above. https://www.postgresql.org/
I have the option of getting the Interactive Installer by EnterpriseDB or I can get the Graphical Installer by BigSQL. The Interactive installer appears to give a straightforward, fast setup for running postgreSQL. The Graphical  installer is a developer-friendly version with the complete postgreSQL environment. I don't think we are really developing on postgresSQL, so probably the fast setup version is better for our usage.

The download page will ask you for which PostgreSQL version you want (I chose 9.6.2) and what your computer's 32 or 64-bit operating system value is. [To find that, look up: https://support.microsoft.com/en-ca/help/827218/how-to-determine-whether-a-computer-is-running-a-32-bit-version-or-64-bit-version-of-the-windows-operating-system

g++ 4.8 or above: I'm pretty sure I don't have this, so I went looking for it. A topic search came up with a site that was a good start: http://www.cplusplus.com/forum/windows/106380/

Basically as a Windows user, I don't have Linux libraries like gcc or g++. So I need a Windows-type work-around. Currently minGW works for that( Minimalist GNU for Windows).

I went and downloaded the newest version from: https://sourceforge.net/projects/mingwbuilds/files/host-windows/releases/4.8.1/64-bit/threads-win32/sjlj/x64-4.8.1-release-win32-sjlj-rev5.7z/download

you will need a 7-zip program to unpack it. I unpacked to my desktop. http://www.7-zip.org/download.html

then i got webmaker:
git clone --recursive https://github.com/mozilla/id.webmaker.org

git clone --recursive https://github.com/mozilla/login.webmaker.org

Next I believe I have to set up PostgreSQL before moving on to publish.webmaker.org

First I set up the id.webmaker. It suggested I create sample.env file.. but it was already there... i don't know if it made a refreshed version... but just heads up.

Next I did:
npm install
npm start --- kinda started then just did nothing so i stopped the process.. however on the localhost:1234 it was showing up.

Then I went to login.wemaker.
npm install
had a lot of ERR while installing
failure during start because of node.js version and other problems.


- March 10, 2017

Tried: https://docs.npmjs.com/getting-started/installing-node .

Check node.js version with 'node -v'
'npm install npm@latest -g'

then went back and try to npm install login.webmaker.


Still got the same errors.. so i researched node-gyp rebuild and found : https://github.com/websockets/bufferutil/issues/25


That's a possible thing to look into... did more research and basically everybody is crying about it and deleting files and dependencies left-right and center trying to fix the issue. I don't have the time to get into that kind of mess that nobody else has successfully figured out yet.

https://github.com/nodejs/node-gyp/issues/629

Basically it looks like this is a HUGE problem for Windows users... I may need to move on to a new Release Issue.

I may continue working on this and use it as my 4th and final release actually. We'll see.


Actually I kept going... and I looked at the error messages and it said:

gyp ERR! command "C:\\Program Files\\nodejs\\node.exe" "C:\\Users\\Shanta\\AppData\\Roaming\\npm\\node_modules\\npm\\node_modules\\node-gyp\\bin     \\node-gyp.js" "rebuild"
gyp ERR! cwd C:\Users\Shanta\login.webmaker.org\node_modules\bcrypt
gyp ERR! node -v v6.10.0
gyp ERR! node-gyp -v v3.5.0
gyp ERR! not ok
npm ERR! code ELIFECYCLE
npm ERR! errno 1
npm ERR! bcrypt@0.8.7 install: `node-gyp rebuild`
npm ERR! Exit status 1

I looked inside login.webmaker.org\node_modules.. and bcrypt isn't even there!

I also looked in C:\\Users\\Shanta\\AppData\\Roaming\\npm\\node_modules\\npm\\node_modules\\node-gyp\\bin     \\node-gyp.js and I didn't even see "rebuild"

https://www.robertkehoe.com/2015/03/fix-node-gyp-rebuild-error-on-windows/

read https://github.com/nodejs/node-gyp and tried:
npm install -g node-gyp


- March 15, 2017

Another contributor made some changes to login.webmaker.org, which supposedly removed the depeendency on bcrypt, so I recloned it and attempted again. Seemed to work, now moving on to setting up postgreSQL... i couldnt use the initdb -D /usr/local/var/postgres
on my command line.. i should probably install it in the same User directory my other softwares are in.

- March 17, 2017

I tried setting up postgreSQL on my user folder... got this message:


- March 19, 2017

Wednesday 15 February 2017

Release 0.1 - Fixing my first bug for Thimble

My first attempt at solving a real-world bug involved issue:

https://github.com/mozilla/thimble.mozilla.org/issues/1715

-------------------------------------------------------------

While running npm install I notice:
npm WARN deprecated nunjucks@2.3.0: potential XSS vulnerability in autoescape mode, and with escape filter was fixed in v2.4.3
We should update to 2.4.3 in both code bases.

---------------------------------------------------------------

The issue itself was a serious problem because it allowed the possibility of hacking into the system through code injections. The current version that Thimble and Brackets used a version of Nunjucks that was vulnerable, but an updated version claimed to have solved that problem.

The fix for the code would have been to inform Thimble and Brackets to use the updated version of Nunjucks when they installed their plugins.

I had to search for a bit to understand how that worked. I discovered the nunjucks 2.3.0 as a dependency inside the package.json file. So for the fix, I simply upgraded the version inside the package.json file. So this taught me that package.json has metadata that is relevant to how the whole project decides what plugins to use and other key information.

For Brackets, they did not have nunjucks included, so I entered a new line in their dependencies list to add nunjucks as well.

The overall difficulty of solving the problem was relatively low, but the improvement in the security of the software could potentially be huge, so I feel somewhat accomplished and proud of the difference I believe I made. It has given me more confidence in attempting to solve bigger problems and knowing that there is always something that can be improved, no matter how small, that can make a big difference in Open Source.

https://github.com/mozilla/thimble.mozilla.org/pull/1742

For more information about the process, check out:

http://osd600osp.blogspot.ca/2017/02/lab-3-fixing-bug-in-mozilla-thimble.html

--------------------------------

[February 24 Update]

So in waiting for a response to my pull requests, I apparently learned why the Brackets source code did not have the nunjucks dependency. I had actually been making a pull request to the Brackets owned by Adobe, not by Mozilla. They quickly pointed out my error and I got rid of my repository for Adobe and switched it out for Mozilla's. Sure enough, nunjucks was there, and I made the same changes as I did for Thimble and sent the pull request right away.


Monday 13 February 2017

Lab 4: Working With GitHub

For this lab, we'll practice using GitHub.

The first thing I have to do is Fork the Spoon-Knife repository to my own repository. This basically means that all the code inside that repository is copied into my GitHub account.

Next I have to clone it to my own local machine. This means that the software can become available for my own computer to use.

I go into Git Bash, create a 'temp' folder for this lab, and copy the SSH key.

I then typed:

git clone git@github.com:Blackweda/Spoon-Knife.git while inside /temp folder.

I got this response:


Sigh... nothing ever seems to work right the first time in this course... I googled the problem and came to this website: https://help.github.com/articles/error-permission-denied-publickey/

Took a few steps:


Apparently I have no identity, so I'll need to generate my own keys: 
https://help.github.com/articles/generating-a-new-ssh-key-and-adding-it-to-the-ssh-agent/ 

 I followed the steps and made ssh keys that are saved. Then I went back and did:


ssh-add ~/.ssh/id_rsa

Inside the /temp folder. It asked for my passphrase and then added the keys! 
Now let's try this all with git cloning again.
 
Again the same problem... but I took a look at the command I entered and made a few changes...


As you can see... I changed:     git@github.com   ->        https://github.com
and I also changed:                   :Blackweda           ->        /Blackweda


NOW WE CAN GET BACK TO WORK...

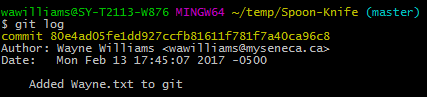
I go into the Spoon-Knife/ folder and    git branch to make sure I'm on the master branch inside the cloned repository using Git Bash.

Added new file:


Created new branch and checked both branches:


Then changed master back to its original version:


Because we are merging two branches that have different commit histories, git will use a recursive merge strategy, and create a new commit merge commit that connects these two branches.


Going through all the branches, I can see that the merged branch (name-and-food) has files from both of the other branches, while each the other branches do not contain the files from the other branches.

'name' has no food.txt
'food' has no Wayne.txt

Also when creating different versions of animals.txt, I noticed that my jungle-animals.txt had the same file as my water-animals.txt and the original animals.txt. So this means that they are all pointing to the same commit I suppose. I checked all three with 'git show' and I was correct.

I've realized through making some errors that having all three branches point to the same commit means that any changes in the branches will be seen by all branches because the commit is the same. Unless we commit the files personally inside a branch, all branches see changes.


 While I was going through the whole process, I had the hardest time with the animals / water-animals / jungle-animals part...

Initially I kept pointing them all to animals, and then changing the animals.txt without actually adding and committing them each time. This essentially made all branch versions of animals.txt point to the most recent version of animals.txt that was edited. 

I discovered I had to 'add' and 'commit' before 'checkout' so that the animals.txt version was local to that branch. 

The squashing just added the commit messages into another commit message, similar to merging branches, but you are merging commit messages instead.. and the rebasing meant that I had to make the changes to animals.txt all over again to make the new merge successful, as it was undoing the previous merging process and repeating the entire process for rebasing the new single commit.

Adding the gh-pages wasn't too hard, just had to setup in my GitHub account and check for the site through the 'Settings' option.


=========================================================================

Entire Instructions:

Git Branches

In this lab you will review working with branches, and learn how to use the special gh-pages branch on Github to host static web content.

1. Review: creating branches

Every git repo begins with a single branch named master. When you commit, the master branch is automatically updated to point to the most recent commit.
Recall from class that we can create a new branch by doing the following:
git checkout -b new-branch
The -b flag indicates that you want to first create the branch if it does not already exist, then switch to it and check it out to your working directory. You could also have written it like this:
git checkout -b new-branch master
In this case, we are explicitly specifying that we want new-branch to be created and point to the same commit to which master is pointing. Because we're already on the master branch, we don't have to do this--git will assume you want to use the current commit. We could also have written it like this:
git checkout -b new-branch HEAD
Here we explicitly specify that we want to use the latest commit on the current branch, also known as HEAD.
If we wanted to have new-branch get created pointing to something other than the latest commit, we can specify that commit instead. For example, if we want it to point back to two commits from the current one (i.e., go back in time), we'd do this:
git checkout -b new-branch HEAD~2
As you switch between branches, if you ever get confused about which branch you're on, use git status or git branch, both of which will indicate the current branch.

2. Resetting a Branch

Sometimes it's necessary to switch the commit to which a branch is pointing. For example, if you accidentally commit things on master vs. a new branch, and need to move master back to a commit in the same history as a remote repository (i.e., if you want to git pull upstream master to get new updates).
Let's walk through an example:
  1. On Github, fork the Spoon-Knife repository at https://github.com/octocat/Spoon-Knife
  2. Clone this repository to your local computer
  3. Confirm that you are on the master branch (i.e., use git branch)
  4. Create a new file called name.txt with your first name in it
  5. Use git to add and commit the new name.txt file.
  6. Confirm that you have 1 new commit on the master branch (i.e., use git log)
At this point we have a new commit on the master branch, but decide that we should have done this work on a new branch. Let's fix things so master is back where it should be, and we instead have a new branch:
  1. Create a new branch called name by doing git checkout -b name
  2. Confirm that you are now on the name branch
  3. Confirm that name and master both point to the same commit (i.e., use git show name and git show master)
We can now move our master branch back one commit, and leave our name branch where it is. We'll do that using the -B flag (note the capital), which will create or reset a branch:
  1. git checkout -B master HEAD~1
  2. Confirm that name and master both point to different commits (i.e., use git show name and git show master)

3. Merging

Next, let's experiment with merging. We'll start by creating a third branch:
git checkout -b fav-food master
This will create a fav-food branch which is pointing to the same commit as master. Confirm that you now have 3 branches (master, name, fav-food) using git branch.
On the fav-food branch, add a new file food.txt with a list of your favourite foods. When you're done, add and commit this file to the fav-food branch.
Let's now try combining our name and fav-food branches. If you're ever unsure about a merge, you can always try doing it on a new branch and see how it goes. Let's try doing our merge on a branch called name-and-food:
  1. Create a fourth branch that points to the same commit as name: git checkout -b name-and-food name
  2. Merge the fav-food branch into name-and-food. When you merge, you always switch to (i.e., checkout) the branch into which you want to merge first, then merge the other branch in: git merge fav-food. Because we are merging two branches that have different commit histories, git will use a recursive merge strategy, and create a new commit merge commit that connects these two branches.
  3. Confirm that you now have a new merge commit on the name-and-food branch (i.e., use git log).
  4. Confirm that the name-and-food branch contains both the name.txt and food.txt files, created on the earlier branches.
  5. Try switching back to your name branch, confirm that you don't have a food.txt file.
  6. Try switching back to your fav-food branch, confirm that you don't have a name.txt file.

4. Merge Conflicts

Git can automatically merge most things without any help. In the previous case, we added two separate files, and git had no trouble combining them. What if we had made changes to the same file?
Let's try an experiment that will simulate two separate lines of development on the same file:
  1. Create a new branch called animals that points to the same commit as master.
  2. Create a new file called animals.txt and add the names of three farm animals, one per line. For example, your animals.txt might look like this:
horse
cow
chicken
When you're done, commit the new animals.txt file to your animals branch. Now let's start two separate changes that both work on animals.txt:
  1. Create a new branch called water-animals that points to the same commit as animals.
  2. On the water-animals branch, edit animals.txt to add 3 water animals. When you're done, commit your changes to the water-animals branch. For example, your animals.txt might look like this:
horse
cow
chicken
whale
seahorse
dolphin
Let's repeat this process, but this time we'll focus on animals that live in jungles:
  1. Create a new branch called jungle-animals that points to the same commit as animals.
  2. On the jungle-animals branch, edit animals.txt to add 3 jungle animals. When you're done, commit your changes to the water-animals branch. For example, your animals.txt might look like this:
horse
cow
chicken
monkey
python
bird of paradise
Now let's merge our water-animals branch into animals:
  1. Switch to your animals branch
  2. Merge water-animals into animals (i.e., git merge water-animals)
  3. Confirm that your animals branch now contains the changes you made to animals.txt
Because our water-animals branch was ahead of our animals branch by 1 commit, git was able to do this merge using the fast-forward merge algorithm, which simply moves the branch ahead to align with the other branch. If you use git log you'll notice that there is no merge commit this time.
Next, let's merge our jungle-animals branch into animals as well. Since both of these branches touch the same lines of the same file, this won't work automatically, and we'll have to fix it manually:
  1. Switch to your animals branch
  2. Merge jungle-animals into animals (i.e., git merge jungle-animals)
Git will respond and indicate that there was an issue merging animals.txt:
Auto-merging animals.txt
CONFLICT (content): Merge conflict in animals.txt
Automatic merge failed; fix conflicts and then commit the result.
Let's fix the merge conflict. Confirm that we are mid-way through a merge and have a merge conflict using git status. You'll see something like this:
On branch animals
You have unmerged paths.
  (fix conflicts and run "git commit")
  (use "git merge --abort" to abort the merge)

Unmerged paths:
  (use "git add <file>..." to mark resolution)

 both modified:   animals.txt

no changes added to commit (use "git add" and/or "git commit -a")

Open the animals.txt file. Here is what mine looks like:
horse
cow
chicken
<<<<<<< HEAD
whale
seahorse
dolphin
=======
monkey
python
bird of paradise
>>>>>>> jungle-animals
Notice the presence of <<<<<<< HEAD, =======, and >>>>>>> jungle-animals. These are conflict markers and show the different versions of the lines in question. Because we are merging into animals, it is our HEAD, and everything between <<<<<<< HEAD and ======= is what is on this branch. Everything between ======= and >>>>>>> jungle-animals is what is on the jungle-animals branch. Because both branches edit the same lines of the same file, git needs us to resolve the conflict. We have a few options:
  • Use what is in HEAD, and erase the lines from jungle-animals
  • Do the opposite and use what is in jungle-animals, and erase what is in HEAD
  • Combine the two sets of changes into one change
In this case, we just need to combine the entries into a single, longer list. He can simply remove the conflict markers and save the file. Here's what mine looks like when I'm done:
horse
cow
chicken
whale
seahorse
dolphin
monkey
python
bird of paradise
Now we can add and commit this conflict resolution in order to finish our merge. When we're done, we'll have a new merge commit that combines the changes from our two branches into animals.

5. Rebasing, Squashing

At this point our animals branch is where we want it, in terms of content; but it's a bit messy in terms of how we got there. Sometimes before we share (i.e., git push) branches to share with colleagues, we want to clean up our history. Wouldn't it be nice if we could take all the different commits we made, and combine them into a single commit that achieved the same result? We can, and it's called a rebase.
First, a few warnings. Unlike a merge, which always keeps your history intact, a rebase will alter your commit history. You should never do this to a branch that has been shared with other developers, since it will erase and re-create commits, which makes it impossible for others to collaborate with you on those commits. A rebase is only something you should do before you share your commits with others.
Let's practice a rebase on our animals branch, and squash our separate commits into one single commit:
  1. Switch to your animals branch
  2. Start an interactive rebase: git rebase -i master
This will open your editor and show you all of the commits on animals that are ahead of master. Mine looks like this:
pick 436a838 Adding animals.txt
pick 595f37e Added water animals
pick 3d7af87 Add jungle animals

# Rebase 21826a9..3b4d451 onto 21826a9 (3 commands)
#
# Commands:
# p, pick = use commit
# r, reword = use commit, but edit the commit message
# e, edit = use commit, but stop for amending
# s, squash = use commit, but meld into previous commit
# f, fixup = like "squash", but discard this commit's log message
# x, exec = run command (the rest of the line) using shell
# d, drop = remove commit
#
# These lines can be re-ordered; they are executed from top to bottom.
#
# If you remove a line here THAT COMMIT WILL BE LOST.
#
# However, if you remove everything, the rebase will be aborted.
#
# Note that empty commits are commented out
The comments at the bottom tell us what our options are. We can pick a commit to include it, squash a commit to combine it with the previous commit (like using git commit --amend), fixup a commit to squash and throw away the commit message, etc.
In our case, let's modify things to include the first commit, and squash the next two into it. To do so, edit the commit message like so, then save and exit your editor:
pick 436a838 Adding animals.txt
squash 595f37e Added water animals
squash 3d7af87 Add jungle animals
Git responds with the same merge conflict we had previously:
error: could not apply 3d7af87... Add jungle animals

When you have resolved this problem, run "git rebase --continue".
If you prefer to skip this patch, run "git rebase --skip" instead.
To check out the original branch and stop rebasing, run "git rebase --abort".

Could not apply 3d7af871d2677c64399c674f6a5937b9bbc48852... Add jungle animals
If you run git status you'll see this:
interactive rebase in progress; onto 21826a9
Last commands done (3 commands done):
   squash 595f37e Added water animals
   squash 3d7af87 Add jungle animals
  (see more in file .git/rebase-merge/done)
No commands remaining.
You are currently rebasing branch 'animals' on '21826a9'.
  (fix conflicts and then run "git rebase --continue")
  (use "git rebase --skip" to skip this patch)
  (use "git rebase --abort" to check out the original branch)

Unmerged paths:
  (use "git reset HEAD <file>..." to unstage)
  (use "git add <file>..." to mark resolution)

 both modified:   animals.txt

no changes added to commit (use "git add" and/or "git commit -a")
The reason that our rebase is failing is because git is replaying our commits one-by-one on top of master, and as it does so, it's hitting a commit that is changing the same lines as a previous one. Once again, edit your animals.txt file to combine the merge conflict:
horse
cow
chicken
<<<<<<< HEAD
whale
seahorse
dolphin
=======
monkey
python
bird of paradise
>>>>>>> 3d7af87... Add jungle animals
Should become:
horse
cow
chicken
whale
seahorse
dolphin
monkey
python
bird of paradise
When you're done, git add animals.txt to signal to git that you've resolve the conflict. Then, you can tell git to continue running the rebase (i.e., do the next commit in your list): git rebase --continue. Finally, git finishes replaying all our commits, and gives us a chance to alter our new commit message:
# This is a combination of 3 commits.
# This is the 1st commit message:
Adding animals.txt

# This is the commit message #2:

Added water animals

# This is the commit message #3:

Add jungle animals

# Please enter the commit message for your changes. Lines starting
# with '#' will be ignored, and an empty message aborts the commit.
#
# Date:      Thu Feb 2 13:01:46 2017 -0500
#
# interactive rebase in progress; onto 21826a9
# Last commands done (3 commands done):
#    squash 595f37e Added water animals
#    squash 3d7af87 Add jungle animals
# No commands remaining.
# You are currently rebasing branch 'animals' on '21826a9'.
#
# Changes to be committed:
# new file:   animals.txt
#
You can change it, or leave it as is. Save and exit your editor. In the end, I have a single commit that combines all of my other commits into one:
$ git log
commit afc5bad7f651be478c69c4e117102bfeb183323c
Author: David Humphrey (:humph) david.humphrey@senecacollege.ca <david.humphrey@senecacollege.ca>
Date:   Thu Feb 2 13:01:46 2017 -0500

    Adding animals.txt

    Added water animals

    Add jungle animals

6. The gh-pages branch

For our final experiment, let's learn how to use Github's special gh-pages branch to host static web content.
First, let's convert our animals.txt file to HTML. Open the file and modify it so it's a proper HTML document, something like this:
 <!doctype html>
 <title>Learning about gh-pages</title>
 <body>
 <ul>
   <li>horse
   <li>cow
   <li>chicken
   <li>whale
   <li>seahorse
   <li>dolphin
   <li>monkey
   <li>python
   <li>bird of paradise
 </ul>
Next, commit your change, then use git mv to rename animals.txt to animals.html. Make sure you commit that rename change as well.
Now let's create a new branch named gh-pages that points to our current commit on animals:
git checkout -b gh-pages animals
Next, push your new gh-pages branch to Github and your forked repo:
git push origin gh-pages
Lastly, we can visit our hosted page at http://{username}.github.io/Spoon-Knife/animals.html. Mine is at https://humphd.github.io/Spoon-Knife/animals.html. There are more instructions here.
NOTE: it can take a few minutes for your gh-pages branch to get published.